SharePoint 2016: Provider Hosted (High Trust) Development Environment Setup
1. Setup of the Development Environment
I mainly followed Configure an environment to run your provider-hosted high trust apps in SharePoint 2013, the best tutorial for beginners!Domains
- SharePoint Server: ssrpdap03
- App domain (IIS site): ssrpdap03apps.com
- Test app site: myapp.ssrpdap03apps.com
DNS
- Primary Zone: ssrpdap03
- (no need to set as it's already in corporate's DNS server)
- Primary Zone: ssrpdap03apps.com
- Host A record: Name=empty, IP=127.0.0.1
- Alias CName record: Name=*, FQDN=ssrpdap03apps.com
- Preferred DNS Server for IPv4: 127.0.0.1
- (no need to set 8.8.8.8.8 as Forwarders as corporate has default DNS Servers setting in Root Hints)
Create SharePoint website
- https://ssrpdap03
- Use Publishing site template
- Neither Developer site template nor side loading feature were necessarily installed
Certificates
- https://ssrpdap03
- I used C:\Users\wj\AppData\Local\Programs\Fiddler\makecert.exe
makecert -n "CN=ssrpdap03" -pe -ss My -sr LocalMachine -sky exchange -m 120 -in "ssrpdap03 Root" -is Root -ir LocalMachine -a sha256 -eku 1.3.6.1.5.5.7.3.1
makecert -n "CN=*.ssrpdap03apps.com" -pe -ss My -sr LocalMachine -sky exchange -m 120 -in "ssrpdap03 Root" -is Root -ir LocalMachine -a sha256 -eku 1.3.6.1.5.5.7.3.1
NOTE: "My": The X.509 certificate store for personal certificates, see https://docs.ansible.com/ansible/2.6/modules/win_certificate_store_module.html.
Run Command Prompt as administrator, then type MMC/Add "Certificates" snap-in (select "Computer Account" and "Local Computer")/view certificates added by makecert:

Export to ssrpdap03.cer and ssrpdap03apps-com.cer respectively, then import both to Trusted Root Certification Authorities/certificates.
Creating a high trust
Get Token Issuer ID
NOTE: Use lowercase according to https://docs.microsoft.com/en-us/sharepoint/dev/sp-add-ins/high-trust-configuration-scripts-for-sharepoint
- Script
$certificate = New-Object System.Security.Cryptography.X509Certificates.X509Certificate2($publicCertPath)
New-SPTrustedRootAuthority -Name "ssrpdap03apps-com.cer" -Certificate $certificate
$realm = Get-SPAuthenticationRealm
$specificIssuerId = "7b3bed05-065d-419e-1f82-7ac727c1607c"
$fullIssuerIdentifier = $specificIssuerId + "@" + $realm
New-SPTrustedSecurityTokenIssuer -Name "ssrpdap03AppsIssuer" -Certificate $certificate –RegisteredIssuerName $fullIssuerIdentifier –IsTrustBroker
New-SPTrustedSecurityTokenIssuer -Name "ssrpdap03AppsIssuer" -Certificate $certificate –RegisteredIssuerName $fullIssuerIdentifier –IsTrustBroker
iisreset
Is the Issuer Certificate (root CA) required to add too? (skip this step)
$rootPublicCertPath= "C:\dev\wan\MyWindsor\Certs\ssrpdap03root.cer"
To remove a root CA:
Remove-SPTrustedRootAuthority "ssrpdap03.cer"
To remove the trust relationship:
Verify
Create a Provider-hosted app website

Set certificate for SharePoint website

Get Private Key
MMC/Add "Certificates" snap-in (select "Computer Account" and "Local Account")/*.ssrpdap03apps.com/All tasks/Export/Yes, export the private key/Password:xxx/save to ssrpdap03apps-com.pfx
Start App Management Service and Subscription Settings Service
http://spcaca.blogspot.com/2013/10/create-on-premise-high-trust-provider.html
$account = Get-SPManagedAccount "domain\spfarmdevlocal"
$account = Get-SPManagedAccount "domain\spfarmdevlocal"
$subscriptionSettingsServiceApplicationName = "Subscription Settings Service"
#Create Subscription Settings Service Application and Proxy
#Create app Management Service Application and Proxy
$appManagementServiceApplicationName = "App Management Service"
$subscriptionSettingsServiceApplicationPoolName = "SharePoint Subscription Settings Service"
$subscriptionSettingsServiceApplicationDatabaseName = "SP_SubscriptionSettingsServiceApplicationDB"
#Create Subscription Settings Service Application and Proxy
$subscriptionSettingsServiceApplicationPool = New-SPServiceApplicationPool -Name $subscriptionSettingsServiceApplicationPoolName -Account $account
$subscriptionSettingsServiceApplication = New-SPSubscriptionSettingsServiceApplication –ApplicationPool $subscriptionSettingsServiceApplicationPool –Name $subscriptionSettingsServiceApplicationName –DatabaseName $subscriptionSettingsServiceApplicationDatabaseName
New-SPSubscriptionSettingsServiceApplicationProxy –ServiceApplication $subscriptionSettingsServiceApplication
#Create app Management Service Application and Proxy
$appManagementServiceApplicationName = "App Management Service"
$appManagementServiceApplicationPoolName = "SharePoint App Management Service"
$appManagementServiceApplicationDatabaseName = "SP_AppManagementServiceApplicationDB"
$appManagementServiceApplicationPool = New-SPServiceApplicationPool -Name $appManagementServiceApplicationPoolName -Account $account
$appManagementServiceApplication = New-SPAppManagementServiceApplication –ApplicationPool $appManagementServiceApplicationPool –Name $appManagementServiceApplicationName –DatabaseName $appManagementServiceApplicationDatabaseName
New-SPAppManagementServiceApplicationProxy –ServiceApplication $appManagementServiceApplication
Set-SPAppSiteSubscriptionName -Name "AanuWizardApp" -Confirm:$falseNote:
- App Management and Subscription service are required for creating App Domain that is a must for SharePoint-hosted apps
- However not sure if it's required for provider-hosted apps
- No such requirement according to http://www.appzinside.com/2015/03/13/configure-an-environment-to-run-your-provider-hosted-high-trust-apps-in-sharepoint-2013/
- All App Management, Subscription and User Profile service are required according to https://blogs.msdn.microsoft.com/russmax/2014/06/23/part-1-intro-to-provider-hosted-apps-setup-the-infrastructure/
- App Management and User Profile service are required according to https://docs.microsoft.com/en-us/sharepoint/dev/sp-add-ins/set-up-an-on-premises-development-environment-for-sharepoint-add-ins#Servertoserver
Start User Profile Service
By default, SharePoint Server uses the built-in User Profile service application to resolve the identity.
Central Admin/Manage service applications/User Profile Service Application/People/Manage User Profiles/New Profiles/Save and Close
https://docs.microsoft.com/en-us/sharepoint/dev/sp-add-ins/set-up-an-on-premises-development-environment-for-sharepoint-add-ins#configure-services-in-sharepoint-for-server-to-server-add-in-use
Use Central Admin UI to start a new User Profile Service Application. Then create at least one profile:Central Admin/Manage service applications/User Profile Service Application/People/Manage User Profiles/New Profiles/Save and Close
Configure App URLs (only required for SharePoint hosted. Skip this step for provider hosted)
NOTE: App domain is only used for SharePoint hosted apps.
Central Admin/Apps/Configure App URLs:
- App domain: ssrpdap03apps.com
- App prefix: app
NOTE: The above is equivalent to the following PowerShell cmdlets:
Set-SPAppDomain -AppDomain ssrpdap03apps.com"
Set-SPAppSiteSubscriptionName -Name "app" -Confirm:$falseCreate App Catalog
(Required for both SharePoint hosted and Provider hosted apps)Central Admin/Apps/Management App Catalog: Create a new app catalog site:
- URL: https://ssrpdap03/sites/apps
- End User: Everyone
2. Create a provider-hosted app
Visual Studio/Create a Provider-hosted app used for SharePoint site https://ssrpdap03.
For Authentication, select User a certificate:
For Authentication, select User a certificate:
- Certificate location: C:\dev\wan\MyWindsor\Certs\ssrpdap03apps-com.pfx
- Password: (private key password)
- Issuer ID: 1e36e7d2-c5b4-2b2f-77cb4a52ebdae83f
Visual Studio will auto-generate two projects. We need to deploy SharePointAddIn1 to SharePoint site https://ssrpdap03, and deploy SharePointAddIn1Web to remote host site i.e. IIS site https://myapp.ssrpdap03apps.com.

Web.Config
<appSettings>
<add key="ClientId" value="27d0dbff-5050-43e0-92b0-e8141d82c11b" />
<add key="ClientSecret" value="bhG0CXmCLWz5MsVoOE6hxEnP9JT0yU5BcGajHjXI5Bs=" />
<add key="ClientSigningCertificatePath" value="C:\dev\wan\MyWindsor\Certs\ssrpdap03apps-com.pfx" />
<add key="ClientSigningCertificatePassword" value="Sharep01nt" />
<add key="IssuerId" value="1e36e7d2-c5b4-2b2f-77cb4a52ebdae83f" />
</appsettings>
Two options to get ClientId and ClientSecret:
Option 1: When clicking F5 to start the app, Visual Studio will auto-fill temporary values.
Option 2 (suggested): Use https://ssrpdap03/_layouts/15/appregnew.aspx to auto-generate the values.
AppManifest.xml
Set Start page and permission:
<Properties>
<Title>SharePointAddIn1</Title>
<StartPage>https://myapp.ssrpdap03apps.com/home/contact?{StandardTokens}?{StandardTokens}</StartPage>
</Properties>
<AppPrincipal>
<RemoteWebApplication ClientId="*" />
</AppPrincipal>
<AppPermissionRequests AllowAppOnlyPolicy="true" >
<AppPermissionRequest Scope="http://sharepoint/content/sitecollection" Right="Read" />
</AppPermissionRequests>

Register the App in SharePoint
(Required for Provider-hosted app only)
Before deploying, we need to register the app with SharePoint site by
https://ssrpdap03/_layouts/15/appregnew.aspx:

Note: Redirect URL here is no use. It's determined by StartPage value in AppManifest.xml.
Note:
If ClientId is set to "*", then Visual Studio will automatically register the app when pressing F5:
<AppPrincipal>
<RemoteWebApplication ClientId="*" />
</AppPrincipal>
However if ClientId is set to a specific value, then each time you have to use appregnew.aspx before pressing F5.
However if ClientId is set to a specific value, then each time you have to use appregnew.aspx before pressing F5.
Deployment
Deploy to the remote app website
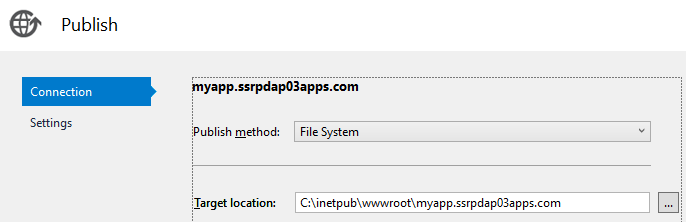
Option 1: Right click the SharePointAddIn1Web project/publish. This is the same as deploying an usual MVC web site, just create a user profile:
Option 2: Right click SharePointAddIn1 project/publish/Deploy your web project.
Deploy to SharePoint site
Option 1 (for dev debugging only): Using Visual Studio
We can simply press F5 to start the SharePoint site, but this way the app will be registered directly into https://ssrpdap03 site rather than into the App Catalog. So it's not recommended.Option 2 (for production): Upload the package to App Catalog
Right click SharePointAddIn1project/publish/Package the add-in:
Then upload the generated SharePointAddIn1.app into App Catalog
https://ssrpdap03/sites/apps
Add App to a Site
If you can't see the app you've uploaded into App Catalog, then please follow https://github.com/SharePoint/sp-dev-fx-webparts/issues/331 to installed the language dependent fixes 2017 CU(required even you use English only) from https://blogs.technet.microsoft.com/stefan_gossner/2017/11/14/november-2017-cu-for-sharepoint-server-2016-is-available-for-download/.


Please follow:
https://sharepoint.stackexchange.com/questions/119774/sharepoint-app-giving-credentials-popup/119806
https://sureshpydi.blogspot.com/2013/04/sharepoint-2013-issue-app-prompting-for.html?showComment=1470215481580#c6116519647350364803
Solution: Regedit/ HKEY_LOCAL_MACHINE\SYSTEM\CurrentControlSet\Control\Lsa/Right click/New /DWord (32-bit) Value/Name: "DisableLoopbackCheck"/Value: "1"
Error Messages
1. App Deploy Error: “A different version of this App is already installed with the same version number”
Check SharePointAddIn2\AppManifest.xml and increase version number as follows:
Version="1.0.0.11" => Version="1.0.0.12"
2. Error message 401.2.:
Unauthorized: Logon failed due to server configuration.
Check SharePointAddIn2Web\Web.config and replace deny with allowa s follows:
<authorization>
<!--<deny users="?" />-->
<allow users="*" />
</authorization>
3. Error message 401.2.:
Unauthorized: Logon failed due to server configuration.
Check SharePointAddIn2Web\Web.config and replace deny with allowa s follows:
4. Run time error:
An unexpected error has occurred. Please try again by launching the app installed on your site.
- Check 1
public class HomeController : Controller
{
[SharePointContextFilter]
public ActionResult Index()
{
User spUser = null;
var spContext = SharePointContextProvider.Current.GetSharePointContext(HttpContext);
...
{
[SharePointContextFilter]
public ActionResult Index()
{
User spUser = null;
var spContext = SharePointContextProvider.Current.GetSharePointContext(HttpContext);
...
To use [SharePointContextFilter], SPHostUrl=SharePointSiteUrl must be passed when access the Add-In, i.e.:
https://myapp.ssrpdap03apps.com/?SPHostUrl=https%3A%2F%2Fssrpdap03
Sharepoint 2013 MVC provider-hosted app. Fails to pass [SharePointContextFilter] on HttpPost
This means you should call the Add-in from SharePoint or from Visual Studio. This way the SPHosuUrl will be automatically passed to the Add-in.
IIS/myapp.ssrpdap03apps.com/Authentication/Ensure Anonymous Authentication is disabled. Only Windows Authentication should be enabled.
This means you should call the Add-in from SharePoint or from Visual Studio. This way the SPHosuUrl will be automatically passed to the Add-in.
- Check 2
IIS/myapp.ssrpdap03apps.com/Authentication/Ensure Anonymous Authentication is disabled. Only Windows Authentication should be enabled.
Comments
Post a Comment